Indoor air pollution is a fact of life, and in many cases, the air indoors is less healthy than the air outdoors. Between dirt, pet dander, dust, and various microorganisms, indoor air can get quite dirty. Many people use air purifiers to make the air that they breathe inside their homes cleaner. But like every other electronic appliance, air purifiers get dirty, and when that happens, they run far less efficiently, but there is a lot you can do to improve its efficiency if you’re a reasonably confident do-it-yourselfer.
This air purifier repair guide was based on many years and many different units.

You’ve probably noticed a layer of dust built up on top of your television or a table in your home and wondered just how much of the stuff there is floating around in the air. Believe it or not, every cubic foot of air in an average home have some 3,000,000 particles of dust suspended in it!
Air purifiers come in two basic types: mechanical and electronic. With a mechanical air purifier, a fan draws air through one or more filters. Typically, a pre-filter removes the biggest matter (such as pet hair), and then a filter with activated charcoal is next in line to remove odors. The third is usually a high-efficiency particulate air (HEPA) filter, which removes more than 99.97% of particles that are 0.3 microns in diameter or larger.
Electronic air purifiers use a simple device called an electrostatic precipitator to remove particles like pollen and smoke from the air. Electrostatic precipitators charge air particles positively and then trap them on a grid that is negatively charged. This air purifier often contains a pre-filter and perhaps an activated carbon filter to eliminate dust and odors. Some of them also contain an ionizer, which is not the same thing as an electrostatic precipitator. An ionizer releases negatively charged ions (and sometimes ozone) into the surrounding air to trap dust particles.
5 possible air purifier problems you can repair
Depending on how many different filters and features an indoor air purifier has, several things can go wrong. Many of them are simple problems that you can fix yourself. Problems such as a dirty precipitating cell, dry motor bearings, clogged filters and air intake, bent collector plates, or broken ionizer wires can often be fixed at home.
How to fix common air purifier problems
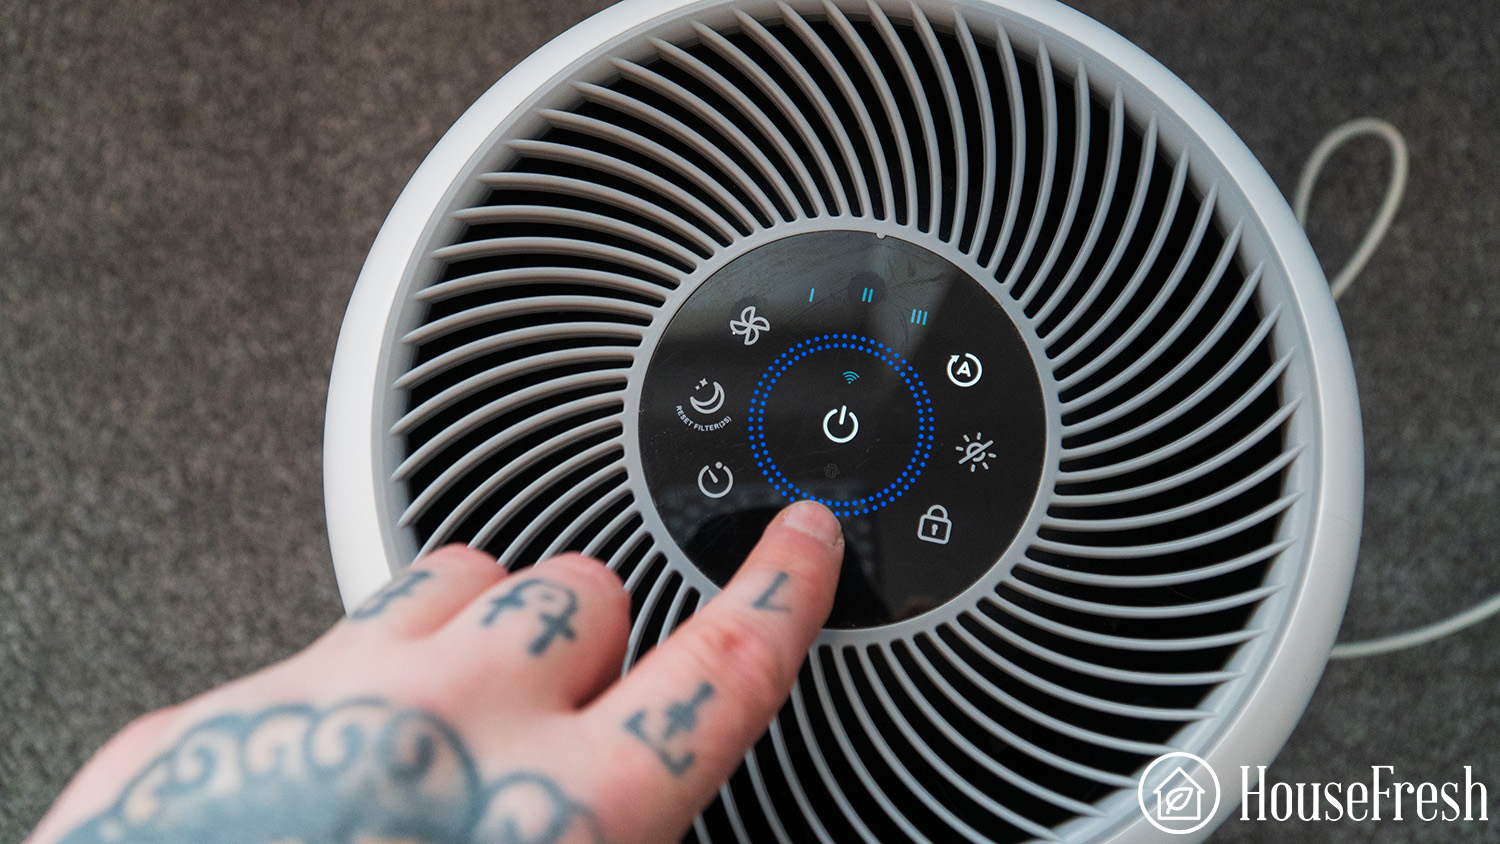
1. Cleaning grill and filters

For a mechanical air purifier, the first step is to turn the machine off and unplug it from the wall.
Usually, there will be release buttons that allow you to remove the intake grill containing the foam pre-filters. Do this and remove the filters. To clean the foam filters, remove them and vacuum them through the grill (so the vacuum won’t attach itself to the filter while you’re using it).
Next, remove the screws that hold the filter housing. Vacuum or clean with a soft cloth. If you use a vacuum, keep the screws and other small parts that could be sucked up by the vacuum away from the part you’re vacuuming.
2. Cleaning the fan

If you need to get to the fan, take out the long screws that hold the housing together and gently pull the two halves of the housing apart.
The fan will have a locking ring at the end of the motor shaft. Put on a pair of safety goggles and remove the fan by twisting or prying the locking ring, but be very careful that you don’t bend the ring.
Take out the screws that hold the motor housing and the switch together. Pull the motor housing apart so you can see the motor. At this point, the switch module should slide out from the housing. You can clean the parts off with a soft cloth.
3. Replacing broken ionizer wires

You can replace broken ionizer wires with replacement wires. Your owner’s manual for the air purifier will tell you where you can get replacement wires. Ensure the air purifier is turned off and unplugged, and remove the precipitating cell according to the owner’s manual instructions. Generally, you use a pair of needle-nose pliers to disengage the wire spring from the connector on each end. You may need to press down on the connector with a screwdriver to free the wire. then you reverse the procedure to put a new wire in place.
4. Testing the precipitator cell

To test the precipitating cell, you need to be familiar with using a multimeter. If you’re not, you probably shouldn’t do this. First, remove the precipitator cell from the machine. Set the meter for Resistance x 1, which may be labeled Rx1 on your meter. Clip one probe to the frame of the precipitator cell, and then touch the other probe to the ionizer terminal, then touch it to one outer collector terminal, and then the other outer collector terminal. If your reading is “1” (which means “infinity”), the cell is working properly. If you get a lower reading, the cell has a short circuit, and you need to replace it.
With the right tools and information, you can pretty much repair any of the popular air purifier models, such as Blueair, Dyson, Levoit, and even the full range of Honeywell purifiers. If you follow our guide and your purifier still does not work, you will likely have to take it to an electronic appliance specialist.
5. Red light showing on air purifier
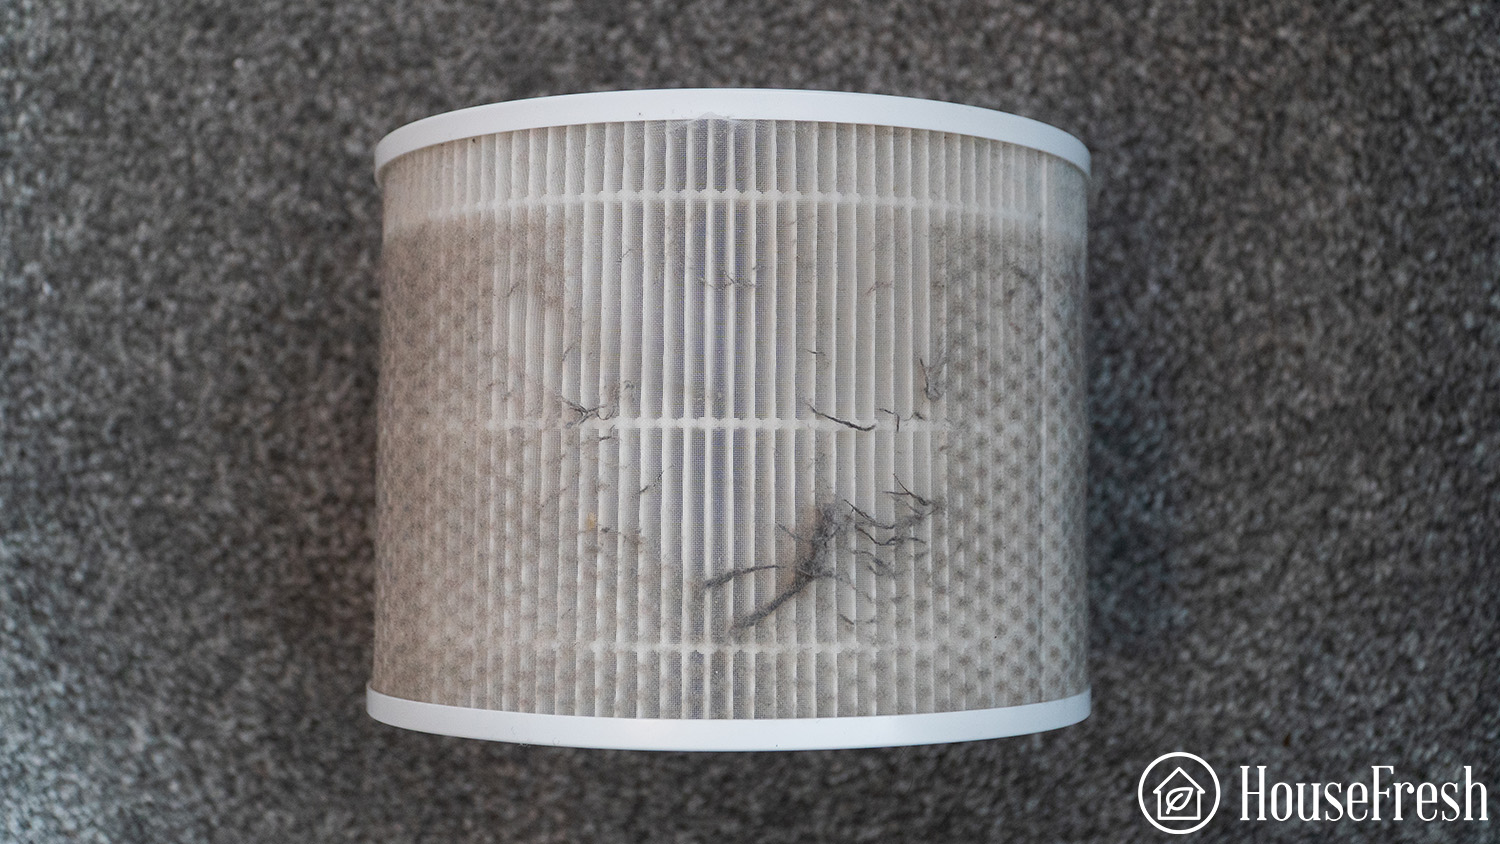
Many air purifiers have a red light to make you aware when it’s time to change the filter. Most smaller air purifiers need the HEPA filters to be replaced every 6 months as embedded particles will restrict airflow and lead to lower performance. Larger air purifiers like the IQAir Healthpro plus have many large filters that need changing every 2-4 years. You don’t need to change the filter until it’s very dirty so feel free to keep using it until you notice lower performance to get the most value out of replacement filters. Many air purifier filter lights are based on timing, so you might visually inspect your filter and then reset the light by holding the button down for at least 5 seconds.
If, after reading this post, you decide that it might be easier to replace your air purifier, then be sure to check out what we think are the best we have tested currently (as of 2023):


Last update on 2024-04-26 / Affiliate links / Images from Amazon Product Advertising API


This is a cool article and the closest I have come to having good repair info for these units. I have an EcoQuest Flair that will not ionize. New plates have been installed but no luck.
Any ideas on things to check with this particular unit? What is the most common cause of failure?
Any help is appreciated.
Thanks.
I have a similar problem in that mine will start and shutdown in a few seconds. It worked great for 2 months. One day it said to clean it as I have before. Cleaned it and now it don’t work. I thought maybe there’s extra dust on the electrode under the blades, cleaned them but still no go. I’m hoping warranty will fix it but I suppose $hipping. It’s a shame. I proudly showed the Ionizer to a friend and next day it don’t work.